INDUSTRIA DEI PRODOTTI QUALTECH

INDUSTRIA DEI PRODOTTI QUALTECH

Valori reali per i nostri clienti e clienti

USA: +1 720 897 7818
Regno Unito: +44 161 408 5668
AU: +61 2 8091 0618

E-mail: [email protected]

INDUSTRIA DEI PRODOTTI QUALTECH
2186 South Holly Street, Denver, Colorado 80222, USA

Apri in Google Maps
  • Ben arrivato
  • Strumenti
    • Misurazione della viscosità
      • Tazze di flusso
        • Coppa di flusso ISO ASTM D5125 ISO 2431 DIN 53224 BS EN 535
        • Coppe Ford ASTM D333 ASTM D365 ASTM D1200 ISO 2431
        • Coppa Zahn ASTM D1084 ASTM D4212 BS EN 535
        • Coppa IWATA giapponese
        • Coppa DIN DIN 53211
        • Tazza a pressione ISO 2811-4 BS 3900-A22
        • Supporti e supporti per tazze di flusso di viscosità
      • Viscosimetro rotazionale
        • Viscosimetro portatile
        • Viscosimetro portatile
        • Viscosimetro rotativo digitale
        • Viscosimetro mandrino con touchscreen
        • Viscosimetro Krebs Stormer
        • Viscosimetro ad alta temperatura
        • Viscosimetro a cono e piatto
        • Bagno di viscosità
        • Viscosimetro Laray
        • Viscosimetro per farina e amido
    • Test di apparenza
      • Lucentezza
        • Misuratore di lucentezza
        • Gloss Meter con micro lente
        • Glossmetro foschia
        • Glossmetro Angolo 45°
        • Glossmetro Angolo 75°
        • Glossmetro tascabile
        • Glossmetro con touchscreen
        • Lettore di colori e misuratore di lucentezza
        • Glossmetro in linea
        • Mini glossmetro
      • Trasparenza Foschia Chiarezza
        • Misuratore di foschia
        • Misuratore di torbidità portatile
        • Misuratore di torbidità da tavolo
      • Colore
        • Lettore a colori portatile
        • Lettore a colori portatile
        • Lettore a colori da banco
        • Spettrofotometro portatile
        • Spettrofotometro da tavolo
        • Gabinetto di valutazione del colore
        • Stazione di prova colore
        • Comparatore di colori Gardner
        • Tintometro Lovibond
        • Carte colori RAL
        • Carte a colori Pantone
        • Lettore a colori portatile per liquidi
        • Colorimetro portatile per polveri
        • Colorimetro portatile per prodotti farmaceutici
        • Software per la corrispondenza dei colori
      • Bianchezza
        • Misuratore di bianchezza portatile
        • Misuratore di bianco portatile
        • Misuratore di bianco ISO da tavolo
        • Misuratore di bianchezza CIE D65
        • Dispositivo di misurazione della porosità
      • Spessore
        • Misuratori di spessore del film umido
        • Misuratore di spessore del film bagnato della ruota
        • Misuratore di spessore del rivestimento
        • Misuratore di spessore ad ultrasuoni
        • Indicatore di ispezione della vernice
        • Spessimetro a banana
        • Calibro
        • Misuratore di spessore del foglio
      • Opacità di riflessione
        • Misuratore di riflettanza
        • Misuratore di riflettanza spettrale portatile
        • Misuratore di riflettanza da tavolo
        • Crittometro digitale
        • Misuratore di riflettanza a infrarossi
        • Misuratore di trasmissione della luce
        • Misuratore di trasmissione della luce in vetro e lente
        • Misuratore di trasmittanza della luce 365 nm e 550 nm e 850 nm e 940 nm
        • Misuratore di trasmissione della luce UV
        • Misuratore di trasmissione della luce IR
        • Misuratore di trasmissione della luce blu
        • Retroriflettometro ad angolo singolo
        • Retroriflettometro multiangolo
    • Serie di applicazioni
      • Verniciatore a immersione
      • Applicatore automatico di film sottovuoto
      • Applicatore automatico di pellicole con tavolo per l'applicazione di pellicole in acciaio inossidabile e vetro
      • Tester di livellamento
      • Tester SAG
      • Applicatori di pellicole
      • Rivestitore di barre metalliche
      • Pistola a spruzzo per vernice
      • Spin Coater
      • Tavolo sottovuoto per applicazione film
      • Superficie di prelievo
      • Grafici a scacchiera
      • Verniciatore a immersione di azoto
      • Verniciatore a immersione multistrato
      • Verniciatore a temperatura costante
      • Casterguide per applicatore di film Cube
      • Camera di spruzzatura automatica del substrato
      • Cabina di spruzzatura per lavaggio ad acqua
    • Misurazione dell'umidità
      • Titolatore Karl Fischer
      • Titolatore coulometrico Karl Fischer
      • Misuratore di umidità digitale
      • Analizzatore di umidità
      • Evaporatore rotante
    • Test delle proprietà fisiche
      • Finezza di macinatura
        • Finezza degli indicatori di macinazione
        • Finezza elettrica dei calibri di macinazione
      • Tempo di asciugatura
        • Registratore del tempo di asciugatura
        • Registratore automatico del tempo di asciugatura
        • Tester di stato a secco
      • Densità
        • Tazze di densità
        • Picnometro a gas
        • Misuratore di densità portatile
        • Misuratore di densità da banco
        • Densitometro portatile
        • Densitometro a trasmissione
        • Densitometro a trasmissione ottica
        • Misuratore di densità di galleggiamento
        • Scott Volumeter
        • Flussimetro Hall
        • Flussometro Carney
        • Misuratore di densità apparente ASTM D1895 Metodo A
        • Misuratore di densità apparente ASTM D1895 Metodo B
        • Misuratore di densità apparente ISO R60
        • Misuratore di densità apparente
        • Volumetria di densità apparente
        • Tocca Densimetro
        • Angolo di riposo della polvere
        • Tester delle caratteristiche delle polveri
        • Sistema automatico di analisi della pulizia dei filtri
        • Picnometro automatico a densità reale
        • Flussimetro Gustavsson
        • Misuratore di densità di Arnold
        • Misuratore di densità apparente Metodo ISO R60
        • Misuratore di densità apparente ASTM D1895 Metodo A
        • Misuratore di densità apparente ASTM D1895 Metodo B
        • Misuratore di densità apparente ASTM D1895 Metodo C
        • Densimetro automatico per liquidi
        • Densimetro per liquidi
        • Armadio Comfort acustico
      • Conducibilità e pH
        • pHmetro tascabile
        • pHmetro portatile
        • pHmetro portatile
        • pHmetro da tavolo
        • Conduttimetro portatile
        • Conduttimetro portatile
        • Conducibilità da tavolo e pHmetro
        • Elettrodo pH
        • Elettrodo ionoselettivo
        • Elettrodo di ossigeno disciolto
        • Elettrodo di riferimento
        • Elettrodo di conducibilità
        • Elettrodo di metallo
        • Elettrodo di temperatura
      • Rifrazione
        • Rifrattometro portatile
        • Rifrattometro digitale portatile
        • Rifrattometro digitale automatico
        • Rifrattometro digitale
        • Rifrattometro analogico
      • Rugosità
        • Misuratore di rugosità superficiale
      • Temperatura e umidità
        • Barra MFFT con touchscreen
        • Misuratore di umidità
        • Termometro da laboratorio
        • Termometro a infrarossi
        • Tester del punto di infiammabilità a tazza chiusa
        • Tester del punto di infiammabilità a tazza chiusa a bassa temperatura
        • Tester automatico del punto di infiammabilità a tazza chiusa
        • Tester del punto di infiammabilità Abel
        • Tester del punto di infiammabilità a tazza aperta
        • Tester del punto di infiammabilità a vaso aperto a bassa temperatura
        • Tester del punto di rammollimento
        • Apparecchio per il punto di fusione
        • Tester del punto di fusione con registrazione video
        • Tester del punto di fusione
        • Tester del punto di fusione del microscopio
        • Analizzatore ottico termico
        • Tester di deflessione del calore
      • Misurazione della tensione
        • Misuratore di tensione superficiale Du Noüy Ring
        • Misuratore di tensione superficiale Piastra di Wilhelmy
      • Misurazione della dimensione delle particelle
        • Analizzatore granulometrico
        • Setacciatore da laboratorio
    • Prove di proprietà meccaniche
      • Strumenti di prova di flessibilità e deformazione
        • Tester di piegatura a T
        • Tester di piegatura del mandrino cilindrico
        • Tester di piegatura del mandrino conico
        • Tester di coppettazione
        • Tester per pugni a sfera
        • Tester di compressione
        • Tester di schiacciamento bordi
        • Tester di resistenza allo scoppio della carta
        • Tester di resistenza allo scoppio del cartone
        • Tester di resistenza allo scoppio tessile
        • Tester di compressione della scatola
        • Roll Crush Tester
        • Tester di flessibilità del film di vernice
        • Substrati campione per tester di flessibilità dello stucco
        • Tester automatico della coppia dei tappi di bottiglia
      • Strumenti per prove di impatto
        • Tester di impatto DuPont
        • Tester di impatto per impieghi gravosi
        • Tester di impatto universale
        • Tester di impatto con dardo in caduta
        • Tester di impatto per pannelli in legno
      • Strumenti per prove di adesione
        • Tester di adesione a taglio incrociato
        • Tester di adesione a lama singola con taglio incrociato
        • Kit di test del righello per tagli incrociati di adesione
        • Kit per test di adesione X Cut
        • Tester automatico del taglio incrociato dell'adesione della vernice
        • Tester di adesione a strappo completamente automatico
        • Tester di adesione a strappo automatico
        • Test di adesione al peeling
        • Tester di attrito del coefficiente COF
        • Peel tester per adesivi
        • Tester di virata ad anello
        • Peel test di adesione
      • Strumenti per prove di durezza
        • Tester di durezza della matita
        • Tester di durezza per matita da tavolo
        • Tester di durezza a matita motorizzato
        • Penna di durezza Dur-O-Test
        • Tester di durezza a pendolo
        • Tester antigraffio automatico
        • Tester automatico di Mar
        • Strumento per graffi
        • Tester di durezza in rimbalzo Leeb
        • Tester di durezza Leeb portatile
        • Durometro portatile
        • Durometro tascabile digitale
        • Durezza portatile Rockwell & Brinell
        • Tester di durezza Rockwell portatile
        • Tester di durezza Brinell per piccoli carichi
        • Durezza Brinell con touchscreen
        • Tester di durezza Brinell
        • Tester di durezza multipla
        • Tester di durezza Rockwell con touchscreen
        • Tester di durezza Rockwell
        • Tester di durezza superficiale Rockwell
        • Tester di durezza Rockwell per campioni di grandi dimensioni
        • Tester di durezza plastica Rockwell
        • Tester di durezza Vickers
        • Tester di durezza Vickers per piccoli carichi
        • Tester di durezza Knoop
        • Micro tester di durezza con touchscreen
        • Micro tester di durezza
        • Tester di indentazione Buchholz
      • Strumenti per prove di abrasione
        • Tester per abrasione a umido
        • Tester avanzato per scrub all'abrasione a umido
        • Tester di abrasione rotativo a piattaforma singola
        • Tester di abrasione rotante a doppia piattaforma
        • Tester di abrasione lineare
        • Crockmeter manuale
        • Crockmeter elettrico
        • Crockmeter elettrico rotativo
        • Misuratore di velocità rotativo
        • Crockmeter circolare in pelle
        • Gakushin Crockmeter
        • Tester per abrasione e pilling Martindale
        • Tester per cilindri oscillatori Wyzenbeek
        • Tester di abrasione RCA
        • Tester di abrasione della sabbia in caduta
        • Scala di trasferimento cromatico a 9 fasi AATCC
        • Schede di prova a colori in scala di grigi AATCC
        • Tester avanzato di abrasione
      • Sistemi di prova di trazione
        • Macchina di trazione a colonna singola
        • Macchina di trazione a doppia colonna
      • Sistemi di prova di fragilità
        • Sistema di test di fragilità
        • Tester di fragilità
      • Test di lavaggio di solidità del colore
        • Solidità del colore al tester di lavaggio
    • Strumenti per prove climatiche
      • Apparecchiatura per test di esposizione agli agenti atmosferici
        • Camera di prova per agenti atmosferici UV desktop
        • Camera di prova per agenti atmosferici ai raggi UV
        • Camera di prova agli agenti atmosferici allo xeno
        • Camera di prova allo xeno con sistema di filtraggio dell'acqua
        • Camera di prova per gli agenti atmosferici ad arco allo xeno
      • Controllo della corrosione
        • Camera di nebbia salina
        • Camera di prova della nebbia salina
        • Camera di prova avanzata in nebbia salina
      • Temperatura e Umidità
        • Forno da laboratorio
        • Forno da laboratorio antideflagrante
        • Forno a muffola
        • Forno sottovuoto da laboratorio
        • Camera luminosa verticale
        • Bagno a bassa temperatura
        • Bagnomaria da laboratorio
        • Bagno d'olio da laboratorio
        • Camera di prova climatica
        • Incubatrice a bagno secco
      • Polimerizzazione UV
        • Attrezzatura per la polimerizzazione UV
        • Radiometro a luce UV
    • Fresatura a dispersione di miscelazione
      • Miscelatore elettrico da laboratorio
      • Agitatore elettrico da laboratorio
      • Miscelatore da laboratorio automatico con timer
      • Dispersore da laboratorio ad alta velocità
      • Dispersore per tutti gli usi da laboratorio
      • Dispersore da laboratorio con timer
      • Dispersore automatico da laboratorio con timer e misurazione della temperatura
      • Dispersore e miscelatore ad alto taglio da laboratorio antideflagrante
      • Mulino a cestello da laboratorio
      • Scuotitore per barattoli di vernice a doppio braccio
      • Scuotitore di vernice automatico
      • Scuotitore pneumatico per vernice
      • Dispenser di vernice
      • Distributore automatico di vernice
      • Agitatore orbitale automatico
      • Scuotitore per piastre da laboratorio
      • Agitatore orbitale grande
      • Dispersore sotto vuoto da laboratorio
      • Dispersore sotto vuoto avanzato
      • Mulino automatico per polveri
      • Mulino per polveri da tavolo
      • Mulino a tre rulli
      • Macina Muller
      • Mulino a sabbia orizzontale da laboratorio
      • Miscelatore pneumatico da laboratorio
      • Impastatrice Pneumatica con Alzata
      • Nano miscelatore
      • Dispersore da laboratorio ad alta velocità
      • Emulsionante da laboratorio
      • Frullatore da laboratorio V
    • Test delle proprietà dell'inchiostro da stampa
      • MEK Tester di abrasione con sfregamento con solvente
      • Tester avanzato di abrasione del solvente MEK
      • Pressa per prove di inchiostro
      • Prova di inchiostro da stampa
    • Strumenti per prove di laboratorio
      • Bilance da laboratorio
      • Bilance da laboratorio con touchscreen a colori
      • Schopper Riegler Tester
      • Tester Riegler per Schopper idraulico
      • Digital Schopper Riegler Tester
      • Tester di libertà standard canadese
      • Tester del punto di caduta
      • Tester del punto di caduta ASTM D2265
      • Tester automatico del punto di goccia ASTM D2265
      • Bilance da banco
      • Bilance a piattaforma
      • Tester di permeabilità ai gas
      • Tester di permeabilità al vapore acqueo
    • Preparazione scientifica del campione
      • Preparazione scientifica di campioni tessili
        • Tagliacampioni GSM
    • Strumenti per test tessili
      • Tester di abrasione MIE
      • Tester di abrasione per usura universale
    • Strumenti di test ambientali
      • Misuratore portatile della qualità dell'aria
      • Campionatore di aria ambiente
    • Strumenti di prova in plastica
      • Tester di impatto Charpy Izod
      • Tester di impatto Charpy
      • Izod Impact Tester
      • Tester dell'indice del flusso di fusione
    • Strumenti di prova cartacei
      • Schopper Riegler Tester
      • Tester Riegler per Schopper idraulico
      • Digital Schopper Riegler Tester
      • Tester di libertà standard canadese
      • Calibro ISO 534
      • Misuratore di spessore carta automatico ISO 534
      • Tester di resistenza allo scoppio della carta
      • Tester di resistenza allo scoppio del cartone
    • Strumenti per prove concrete
      • Martello di rimbalzo per calcestruzzo
      • Martello da rimbalzo digitale per calcestruzzo
  • Attrezzatura
    • Dispersori di produzione industriale
      • Dispersore industriale
      • Dispersore industriale a doppio albero
      • Dispersore multialbero industriale
      • Dispersore sottovuoto industriale
      • Disperdente ad alta viscosità
      • Dispersore nel serbatoio
      • Dispersore nel serbatoio pressurizzato
      • Dispersore sottovuoto nel serbatoio
      • Lame a dispersione
    • Miscelatori e agitatori per produzione industriale
      • Miscelatore in vasca
    • Frullatori di produzione industriale
      • Frullatore V
      • Frullatore a doppio cono
    • Mulini e macinatori di produzione industriale
      • Mulino a canestro industriale
      • Mulino a tre rulli
  • Sostanze chimiche
  • Contattaci
  • Chi siamo
GRATUITOCITAZIONE
  • Casa
  • Scienza e ricerca
  • ISO 1518 Scratch Test Method for Paints and varnishes — Determination of scratch resistance

ISO 1518 Scratch Test Method for Paints and varnishes — Determination of scratch resistance

ISO 1518 Scratch Test Method for Paints and varnishes — Determination of scratch resistance

da INDUSTRIA DEI PRODOTTI QUALTECH Scienza e ricerca / domenica, 16 Marzo 2025 / Pubblicato il Scienza e ricerca

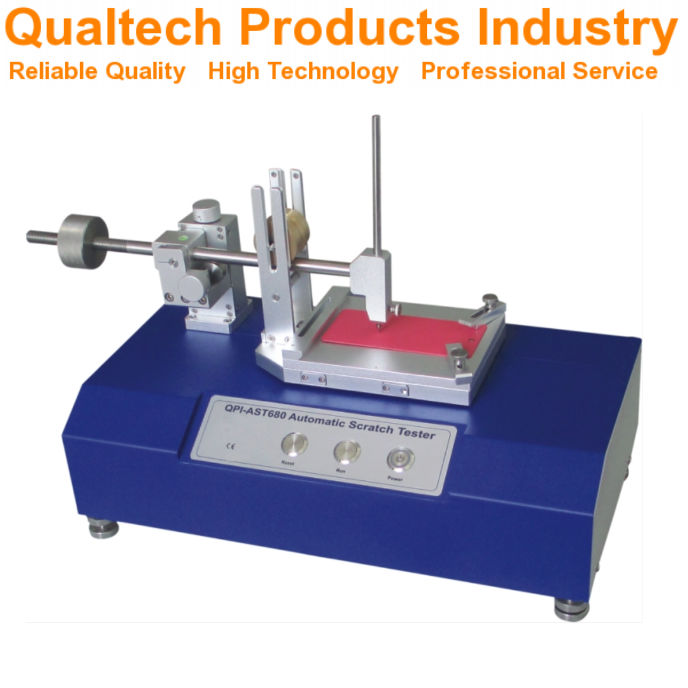
When it comes to testing the durability of paint and varnish coatings, few methods are as widely recognized as the ISO 1518 Scratch Test. This standardized method allows manufacturers and quality control specialists to measure how well a coating resists mechanical damage under controlled conditions. The ISO 1518 test method determines the scratch resistance of single coatings or multi-coat systems of paint, varnish or related products by applying a defined load to a stylus that moves across the surface.Tester antigraffio automatico

Una punta metallica viene passata su una superficie verniciata, lasciando una serie di graffi paralleli. L'area viene quindi esaminata per verificare eventuali danni alla vernice o alla vernice stessa.

The test works by creating a controlled scratch on the coating’s surface, revealing valuable information about its performance in real-world applications. Whether you’re developing new coating formulations or evaluating existing products, understanding this test helps you make informed decisions about coating quality and durability.

Key Takeaways

  • The ISO 1518 Scratch Resistance Test uses a stylus under constant load to evaluate coating durability under defined conditions.
  • Test results help you compare different coating systems and determine if they meet specific performance requirements for various applications.
  • Proper preparation of test panels and calibrated equipment are essential for obtaining accurate and reproducible results when conducting the test.

Scope of ISO 1518

Macchina per graffi strumentata

Uno stilo metallico graffia una superficie verniciata, lasciando un segno visibile. Un righello misura la lunghezza del graffio.

The ISO 1518 standard specifically focuses on determining the scratch resistance of paints and varnishes under defined conditions. This test method applies to both single coating applications and multi-coat systems.

You can use this method to evaluate various coating materials including paints, varnishes, and related products. The test helps you assess how well these coatings withstand mechanical damage from scratching.

The standard is divided into two parts. ISO 1518-1 covers the constant load method, while ISO 1518-2 addresses the variable load approach. Both provide standardized procedures for consistent testing.

When you conduct this test, you’ll be able to determine the minimum load at which visible damage occurs to the coating surface. This information is valuable for comparing different coating formulations and their durability.

The scope does not extend to other forms of mechanical resistance such as impact or abrasion testing. It is specifically designed for scratch resistance evaluation only.

This test method is applicable to laboratory samples as well as coated manufactured products. You can perform these tests on flat surfaces prepared according to the standard’s specifications.

Principles of the Scratch Test Method

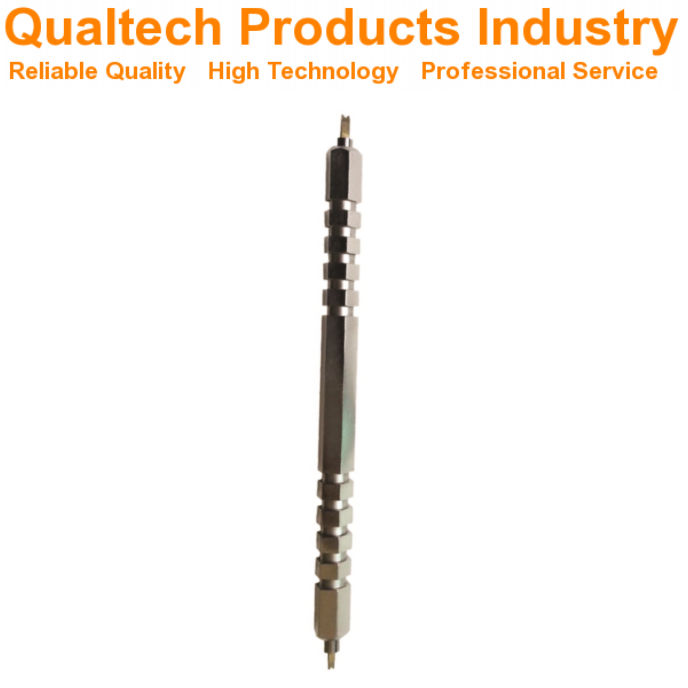
Strumento per graffi

Un'asta di metallo con la punta appuntita graffia una superficie verniciata, lasciando un segno visibile

The ISO 1518 scratch test evaluates a coating’s ability to resist mechanical damage by applying controlled pressure with a stylus. This method helps determine critical failure points of paint and varnish coatings.

Scratch Test Equipment

The test requires a scratch tester apparatus that consists of a hemispherical-tipped stylus and a loading mechanism. According to ISO 1518-1, the stylus is typically made of hardened steel with a tip radius of 0.5 mm. The apparatus must be capable of moving the stylus across the coating at a constant speed.

The loading mechanism applies a defined, stable force perpendicular to the coating surface. You’ll need a device to measure this force accurately, usually in newtons.

The equipment should also include a means to secure the test panel firmly to prevent movement during testing. Some advanced models include optical systems to observe and record the scratch formation in real-time.

Test Parameters Setup

Before conducting the test, you must properly configure several key parameters. The applied load is critical and can be adjusted incrementally to determine the threshold at which coating failure occurs.

The test speed must be kept constant, typically between 30 mm/s to 40 mm/s. This ensures consistent results across different test sessions.

Temperature and humidity conditions should be standardized, usually at 23°C ± 2°C and 50% ± 5% relative humidity unless otherwise specified.

Your test panels must be prepared according to specific requirements with uniform coating thickness. The surface should be clean and free of contaminants.

Rest time between coating application and testing is also important, typically minimum 7 days for air-drying paints or as specified in the product data sheet.

Preparation of Test Panels

Strumento per graffi DIN

Un pannello metallico con una superficie liscia viene graffiato con una forza controllata utilizzando uno strumento appositamente progettato. Il graffio viene quindi valutato per profondità e aspetto.

Proper test panel preparation is crucial for accurate ISO 1518 scratch resistance testing. You must select panels that match your real-world application requirements.

For standard testing, use flat metal panels made of steel, aluminum, or tin plate. These panels should be clean and free from any defects that might affect test results.

Before coating application, you must clean the panels thoroughly to remove grease, dust, and other contaminants. Wipe the surface with a suitable solvent like acetone or isopropyl alcohol, then allow it to dry completely.

Apply the coating (paint or varnish) to the test panel according to the manufacturer’s instructions. This includes following recommended application methods, thickness, and drying conditions.

Important panel specifications:

  • Size: Typically 150 mm × 100 mm
  • Thickness: Minimum 0.8 mm for metal panels
  • Flatness: Panels must be flat without warping

The coating should be applied evenly across the entire panel. You may need to measure the dry film thickness to ensure uniformity using a suitable measurement device.

Allow the coated panels to dry and cure completely according to the test method specifications. This typically includes:

  • Drying at room temperature (23 ± 2)°C
  • Relative humidity (50 ± 5)%
  • Minimum curing time of 7 days (unless otherwise specified)

Before testing, condition the panels at the standard testing temperature and humidity for at least 16 hours.

Performing the Scratch Test

Tester automatico di resistenza al mar

Uno stilo metallico graffia una superficie rivestita con pressione variabile, creando una serie di segni paralleli e perpendicolari

The scratch test requires careful execution to obtain reliable results. Proper technique and control of variables ensure consistent measurements of coating resistance to mechanical damage.

Applying the Scratch

To perform the scratch test according to ISO 1518, you must first secure your test panel firmly on a stable surface. The stylus tip should be positioned at one end of the intended scratch path.

Apply the predetermined constant load to the stylus. For the constant loading method described in ISO 1518-1, you need to select the appropriate weight based on coating type and expected performance.

Move the stylus across the coating at a steady speed of 30-40 mm/s. Maintain consistent pressure and angle throughout the test. The scratch should be approximately 10 cm long.

After completing the scratch, examine the resulting mark under good lighting conditions. Look for coating penetration down to the substrate, which indicates failure at that load level.

Control of Test Variables

Temperature and humidity significantly affect test results. You should conduct tests at 23 ± 2°C and 50 ± 5% relative humidity unless otherwise specified for specific coating types.

Il test apparatus must be calibrated regularly to ensure accurate loading. Check the stylus tip condition before each test session—damaged or worn tips can invalidate results.

Substrate preparation and coating application must be standardized. Record film thickness at multiple points across the test panel.

Key variables to control:

  • Speed of stylus movement
  • Applied load precision (±0.1N)
  • Stylus tip geometry (1 mm hemispherical)
  • Panel temperature
  • Coating age (fully cured)

Evaluation of Scratch Resistance

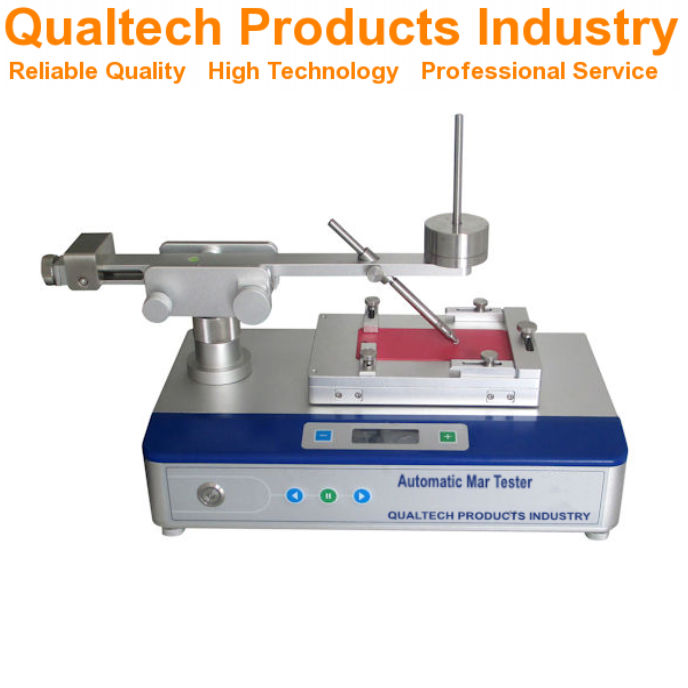
Tester automatico di Mar

Un pannello metallico con una superficie liscia e uniforme viene posizionato su una piattaforma piana e stabile. Uno stilo appesantito viene quindi fatto scorrere sulla superficie in linea retta a velocità e pressione costanti.

After conducting the ISO 1518 scratch test, proper evaluation of the results is crucial for determining coating performance. The assessment involves both qualitative visual inspection and quantitative measurement techniques.

Visual Inspection Criteria

The visual inspection of scratch resistance follows specific criteria outlined in the ISO 1518 standard. You should examine the tested surface under good lighting conditions, preferably using a light source at 45° to the surface.

Look for the following key indicators:

  • First visible scratch mark: The lowest load at which a continuous scratch becomes visible
  • Penetration to substrate: The load at which the coating is penetrated to reveal the substrate
  • Coating deformation: Any signs of cracking, flaking, or delamination

You must record the results in newtons (N) to the nearest 0.1 N. For multi-coat systems, note which layer has been exposed by the scratch.

Take photographs of the scratch patterns for documentation purposes if required by testing protocols.

Measurement of Scratch Width

The scratch width measurement provides quantitative data for comparing different coating formulations. You can measure scratch width using:

  • Optical microscope: With calibrated reticle or digital measuring capability
  • Profilometro: For precise depth and width measurements
  • Image analysis software: For automated measurement of scratch dimensions

Record measurements at several points along the scratch length, typically at 5 mm intervals. The standard testing procedure requires a minimum of five measurements to calculate an average width.

Express results in micrometers (μm) with appropriate precision. Higher quality coatings typically show narrower scratch widths at equivalent loads. Plot the scratch width against applied load to create a performance curve for comparative analysis.

Reporting Test Results

Tester ISO 1518

Un'asta di metallo con la punta appuntita viene trascinata su una superficie dipinta, lasciando una serie di graffi. La superficie viene quindi esaminata con una lente d'ingrandimento per una valutazione.

Accurate documentation of scratch resistance testing results is essential for quality control and product development. Proper reporting allows for meaningful comparisons between different coating formulations and helps determine if products meet required specifications.

Data Representation

When reporting ISO 1518 scratch test results, you should include both numerical and visual documentation. Record the critical load at which coating failure occurs in Newtons (N) for constant load tests according to ISO 1518-1. For variable load tests, document the minimum load that causes coating penetration.

Include photographs of the scratch patterns when possible. These provide visual evidence of the failure mode and help with future reference.

Create a standardized table format that includes:

  • Sample identification
  • Test date
  • Applied load(s)
  • Number of test repeats
  • Mean critical load value
  • Standard deviation

Each test report should clearly indicate which part of ISO 1518 was used (Part 1 or Part 2) as the test methodologies differ significantly.

Interpretation Guidelines

You should establish clear pass/fail criteria before conducting tests. Define the minimum acceptable scratch resistance value based on product specifications or industry standards.

When interpreting results, consider the following factors:

  • Failure mode: Distinguish between complete penetration to substrate versus surface deformation
  • Pattern consistency: Evaluate if failures occur uniformly or at random points
  • Comparative analysis: Compare results against reference materials or previous batches

Note that higher critical load values indicate better scratch resistance. However, interpret results in context of the coating’s intended application environment.

Be careful not to overinterpret minor variations between samples. Statistical significance should be established before concluding meaningful differences exist. Consider environmental factors like temperature and humidity which may influence test outcomes.

Quality Control and Reproducibility

Strumento di prova ASTM D2197

Un pannello metallico con superficie verniciata viene bloccato in una macchina di prova. Una punta diamantata applica una forza controllata per creare un graffio sulla superficie verniciata.

Ensuring reliable test results with the ISO 1518 scratch test requires strict quality control measures. This qualification is essential for industries where coating durability directly impacts product performance.

To maintain reproducibility, you must regularly calibrate your testing equipment. The scratching tool, particularly the hemispherically tipped needle mentioned in ISO 1518, requires inspection for wear or damage before each test session.

Environmental conditions play a crucial role in test consistency. You should conduct tests at standard temperature (23 ± 2°C) and relative humidity (50 ± 5%) unless otherwise specified.

Key Quality Control Factors:

  • Equipment calibration
  • Needle condition verification
  • Consistent sample preparation
  • Standardized environmental conditions
  • Trained operators

Sample preparation techniques must follow the guidelines outlined in ISO 1518-1:2019. This includes proper curing time and uniform application thickness.

Test operators should receive thorough training on both equipment operation and result interpretation. Your interpretation criteria must be consistent across all testing personnel.

For multi-lab testing scenarios, round-robin testing helps verify consistency. You should establish acceptable variance ranges for your specific testing application.

Documentation is essential for quality assurance. Your records should include all test parameters, environmental conditions, and detailed observations of coating behavior during testing.

Maintenance and Calibration of Equipment

Scratch Tester automatico DIN EN ISO

Uno strumento di precisione applica una forza controllata a una superficie verniciata, misurando la profondità dei graffi con un display digitale

Proper maintenance and regular calibration of scratch test equipment ensure accurate and repeatable results when testing paint and varnish surfaces according to ISO 1518 standards. These practices are essential for maintaining the integrity of test data over time.

Routine Maintenance

Clean the scratch tool tip after each test to prevent cross-contamination between samples. Inspect the hemispherical tip regularly under magnification for signs of wear, deformation, or damage that could affect test results.

Replace the needle tip when any flattening or irregularities are observed, as this will compromise the validity of your scratch resistance measurements. Most manufacturers recommend tip replacement after approximately 100 tests.

Store the scratch tester in a dust-free environment and cover when not in use. Regularly check moving parts and loading mechanisms for smooth operation, applying appropriate lubricant as specified by the equipment manufacturer.

Wipe down guide rails and load-bearing surfaces monthly with a lint-free cloth. Examine the base plate for flatness and clean test surfaces thoroughly before mounting specimens to ensure proper contact.

Calibration Procedures

Calibrate your scratch tester at least every six months or after 500 tests, whichever comes first. Use certified reference materials with known scratch resistance values to verify equipment performance.

The load application system must be calibrated using certified weights traceable to national standards. Check that the applied force matches the displayed or set values within ±2% across the full range of test loads.

Calibration Check Points:
- Zero point verification
- Linear response across load range
- Speed control accuracy (5 mm/s ±0.5 mm/s)
- Horizontal movement stability

Maintain a calibration log documenting dates, procedures, results, and any adjustments made. When calibrating the scratch tip geometry, use a calibrated microscope to verify the 1 mm diameter hemispherical shape as specified in ISO 1518-1.

Record ambient conditions during calibration, as temperature and humidity can influence test performance. If your equipment fails calibration checks, contact the manufacturer for service before conducting further tests.

Safety Considerations

Macchina Mar strumentata

Un pannello metallico con una griglia di graffi, uno strumento per graffiare e una lente di ingrandimento per l'ispezione

When performing the ISO 1518 scratch test for paints and varnishes, you should always prioritize safety. The test involves sharp instruments that could cause injury if mishandled.

Always wear appropriate personal protective equipment (PPE) during testing. This includes safety glasses to protect your eyes and gloves to protect your hands from sharp tools and chemicals.

The test may involve working with paints and varnishes that contain volatile organic compounds (VOCs). Ensure your testing area is well-ventilated to prevent inhalation of potentially harmful fumes.

Keep your workspace clean and organized. This reduces the risk of accidents and ensures accurate test results. Store all testing equipment properly when not in use.

Essential Safety Equipment:

  • Safety glasses
  • Protective gloves
  • Lab coat
  • Proper ventilation system

Be aware of the physical hazards associated with the testing apparatus. The scratch testing needles have sharp tips that can cause puncture wounds if mishandled.

When disposing of test samples and materials, follow local regulations for chemical waste disposal. Some coating materials may be classified as hazardous waste.

If you’re operating automated scratch testing equipment, ensure you’re familiar with the manufacturer’s safety instructions before use. Never bypass safety features on testing equipment.

Document any safety incidents during testing and review procedures regularly to prevent future occurrences. Your safety should always be the primary concern when conducting any laboratory testing.

Domande frequenti

DIN 53167

Un pannello metallico con una griglia di graffi uniformemente distanziati, un righello e una lente d'ingrandimento su una superficie di lavoro pulita

The ISO 1518 scratch test method includes specific parameters for measuring coating durability and resistance to mechanical damage. These common questions address testing equipment, applicable coatings, and result interpretation.

What types of coatings can be evaluated using the ISO 1518 scratch test method?

The ISO 1518 scratch test method can evaluate a wide range of coating materials. This includes single coatings or multi-coat systems of paint, varnish or related products.

You can test both decorative and protective coatings on various substrates. The method works well for automotive finishes, industrial coatings, and architectural paints.

What apparatus is required to conduct the scratch resistance test as per ISO 1518 standards?

The primary instrument needed is a scratch tester with a hemispherically tipped needle. This device must allow controlled application of force during the scratching process.

You’ll also need proper sample preparation tools and a means to measure the applied load. Some versions require a constant-load apparatus while others use a progressively increasing load mechanism.

How does the ISO 1518 method measure the scratch resistance of paints and varnishes?

The ISO 1518 method measures scratch resistance by drawing a hemispherically tipped needle across a coated surface under defined conditions. The test evaluates how well the coating withstands this mechanical stress.

You can observe at what load the coating begins to show damage. The higher the load required to produce visible damage, the better the scratch resistance of the coating.

What are the differences between ISO 1518-1 and ISO 1518-2 standards regarding scratch resistance testing?

ISO 1518-1 uses a constant load method where a specific weight is applied throughout the test. This provides a straightforward pass/fail assessment at predetermined loads.

ISO 1518-2 employs a variable load technique where force increases progressively during the test. This allows you to determine the exact load at which coating failure occurs.

How are scratch resistance test results interpreted under ISO 1518 guidelines?

Results interpretation depends on whether you’re using the constant load (ISO 1518-1) or variable load (ISO 1518-2) method. For constant load tests, you report whether the coating showed damage at each tested load.

For variable load tests, you record the minimum load that caused coating penetration. Higher numerical values indicate better scratch resistance properties.

Can ISO 1518 scratch test method be applied to both water-based and solvent-based coatings?

Yes, the ISO 1518 scratch test method works equally well for water-based and solvent-based coating systems. The test evaluates physical resistance properties regardless of the coating chemistry.

You can compare different coating technologies using this standardized approach. This makes it valuable for product development and quality control across various coating formulations.

Su INDUSTRIA DEI PRODOTTI QUALTECH Scienza e ricerca

What you can read next

ASTM D823 Standard practices for producing films of uniform thickness of paint coatings and related products on test panels
ASTM D5125-10(2020)e1 Standard Test Method for Viscosity: Understanding Its Purpose and Industry Applications
Metodo di prova standard ASTM B212-21 per la densità apparente: guida essenziale per i test sulle polveri metalliche

RICHIEDI UN PREVENTIVO GRATUITO

Contattaci – Vorremmo avere tue notizie

Ottieni subito informazioni su prodotti, supporto tecnico, servizio clienti, vendite, pubbliche relazioni, servizi professionali e partner. Puoi anche fornire feedback sul nostro sito Web.
Si prega gentilmente di compilare questo modulo. Uno dei nostri esperti risponderà alla tua richiesta a breve. In alternativa, contattaci tramite i dettagli dell'azienda negli Stati Uniti, in Australia o nel Regno Unito.

    Si prega di notare che rispettiamo la tua privacy e manteniamo i tuoi dati strettamente riservati.

    ASTM
    ANSI
    bsi
    CEI
    AATCC
    TUV
    ISO
    DIN

    © 1978 - 2025 QUALTECH PRODOTTI INDUSTRIA Termini di utilizzo Termini & Condizioni Biscotti Contattaci

    TORNA SU
    Questo sito utilizza i cookie per migliorare la tua esperienza, tuttavia rispettiamo la tua privacy e i cookie raccolgono solo dati anonimi. Rispettiamo la tua privacy e puoi annullare l'iscrizione, se lo desideri.
    Impostazioni dei cookieAccettare tutti
    Gestisci il consenso

    Panoramica sulla privacy

    Questo sito Web utilizza i cookie per migliorare la tua esperienza durante la navigazione nel sito Web. Di questi, i cookie classificati come necessari vengono memorizzati nel tuo browser in quanto sono essenziali per il funzionamento delle funzionalità di base del sito web. Utilizziamo anche cookie di terze parti che ci aiutano ad analizzare e comprendere come utilizzi questo sito web. Questi cookie verranno memorizzati nel tuo browser solo con il tuo consenso. Hai anche la possibilità di disattivare questi cookie. Ma la disattivazione di alcuni di questi cookie potrebbe influire sulla tua esperienza di navigazione.
    Necessario
    Sempre abilitato
    I cookie necessari sono assolutamente essenziali affinché il sito web funzioni correttamente. Questi cookie garantiscono le funzionalità di base e le caratteristiche di sicurezza del sito web, in modo anonimo.
    BiscottoDurataDescrizione
    cookielawinfo-checkbox-analytics11 mesiQuesto cookie è impostato dal plug-in GDPR Cookie Consent. Il cookie viene utilizzato per memorizzare il consenso dell'utente per i cookie nella categoria "Analytics".
    cookielawinfo-checkbox-funzionale11 mesiIl cookie è impostato dal consenso cookie GDPR per registrare il consenso dell'utente per i cookie nella categoria "Funzionali".
    cookielawinfo-checkbox-necessario11 mesiQuesto cookie è impostato dal plug-in GDPR Cookie Consent. I cookie vengono utilizzati per memorizzare il consenso dell'utente per i cookie nella categoria "Necessari".
    cookielawinfo-checkbox-altri11 mesiQuesto cookie è impostato dal plug-in GDPR Cookie Consent. Il cookie viene utilizzato per memorizzare il consenso dell'utente per i cookie nella categoria "Altro.
    cookielawinfo-checkbox-performance11 mesiQuesto cookie è impostato dal plug-in GDPR Cookie Consent. Il cookie viene utilizzato per memorizzare il consenso dell'utente per i cookie nella categoria "Prestazioni".
    visti_cookie_policy11 mesiIl cookie viene impostato dal plug-in GDPR Cookie Consent e viene utilizzato per memorizzare se l'utente ha acconsentito o meno all'uso dei cookie. Non memorizza alcun dato personale.
    Funzionale
    I cookie funzionali aiutano a eseguire determinate funzionalità come la condivisione del contenuto del sito Web su piattaforme di social media, la raccolta di feedback e altre funzionalità di terze parti.
    Prestazione
    I cookie per le prestazioni vengono utilizzati per comprendere e analizzare gli indici di prestazione chiave del sito Web che aiutano a offrire ai visitatori un'esperienza utente migliore.
    Analitica
    I cookie analitici vengono utilizzati per capire come i visitatori interagiscono con il sito web. Questi cookie aiutano a fornire informazioni sulle metriche relative al numero di visitatori, frequenza di rimbalzo, fonte di traffico, ecc.
    Annuncio
    I cookie pubblicitari vengono utilizzati per fornire ai visitatori annunci e campagne di marketing pertinenti. Questi cookie tracciano i visitatori attraverso i siti Web e raccolgono informazioni per fornire annunci personalizzati.
    Altri
    Altri cookie senza categoria sono quelli che vengono analizzati e non sono stati ancora classificati in una categoria.
    ACCETTA E SALVA
    it_ITItaliano
    en_USEnglish da_DKDansk de_DEDeutsch elΕλληνικά es_ESEspañol es_MXEspañol de México fiSuomi fr_FRFrançais fr_CAFrançais du Canada nl_NLNederlands sv_SESvenska pt_PTPortuguês it_ITItaliano
    en_US English
    en_US English
    da_DK Dansk
    de_DE Deutsch
    el Ελληνικά
    es_ES Español
    es_MX Español de México
    fi Suomi
    fr_FR Français
    fr_CA Français du Canada
    it_IT Italiano
    nl_NL Nederlands
    sv_SE Svenska
    pt_PT Português